
The first thing we did after preparing our van so that it was spotless was to cut a massive hole in the side to install our window.
Now being novice van builders at this point, this was quite a daunting task. No matter how many YouTube videos you’ll watch making cutting a hole in metal with jigsaw look… well… easy. I can guarantee you it’ll not make the psychological battle you face any easier!
The first time we did this it took us 7 hours to install our van conversion window. This was back in August of 2017 when we first got the van. So if this is your first time make sure you have plenty of time and that rain isn’t on the horizon.
I recently did this again on my own for the passenger side window and it took just over two hours. This was thanks to upgrading our toolkit with things like suction cups and the benefit of experience.
Tools you’ll need.
Having done this twice once with & once without experience it was simple to see where the difficulties came from. In order to do this successfully you’ll need the following;
- Suction cups
- Jigsaw
- Metal jigsaw blades fine tooth
- Masking tape
- Anti rust hammerite paint
- Window bonding kit
- Hammer
- Center punch
- Reciprocating Saw
- Drill Bit
- Drill
- Mastic gun
Steps to install a campervan window
Here is everything we did in installing our two side windows into our van.
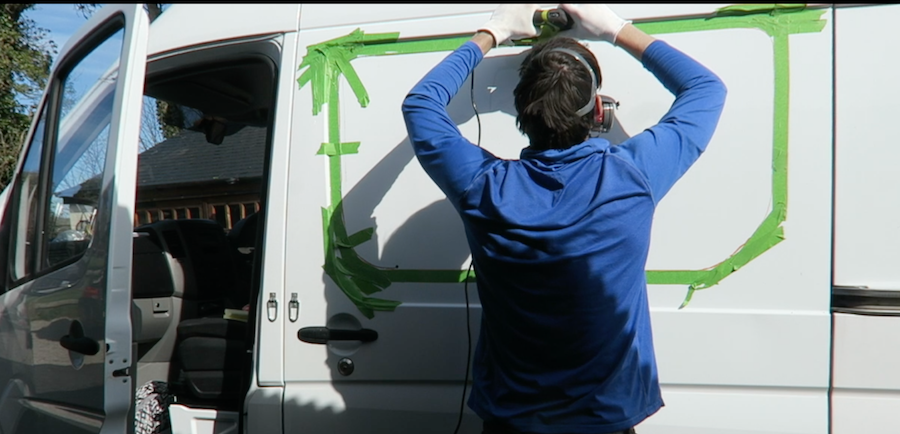
Marking out where to cut
Thankfully this is quite straight forward due to the there is an internal template for the window which you can transfer through the outside of the van with a center punch. You’ll need to go around the inside of the window with the center punch resting on the inner lip and knock with some force onto the outside.
Go outside to check that the knocks are creating small visible dents. It’s this you’ll be drawing over to make out the external template.
You can see the start of this at the beginning of this video and then the outcome at 1:11.
Making the template
With a whiteboard pen & a straight edge join all the “dots” you’ve knocked out on the outside of the van. For the corners we found that doing it freehand was the most effective way to join the marks. One thing to note, you’d rather be cutting on the inside of the lines so make sure the edge of the masking tape is flush with your dots.
Masking off the corners
Second time round I realised that the core parts to mask are these corners (the ones to the left of me) this is where the jigsaw angles get pretty acute and tricky and can potentially cause some paint damage. Be liberal with the masking tape and mask the corners well!
This is because the most stress put on the paint will be done whilst manouvering around them. You’ll see on our tool list a reciprocating saw. This was on there because there is one corner on the sprinter which can be tricky for wider base jigsaws to get around. You can see me doing this at this point in the video. After breaking 3 blades this tool did the trick and massively sped up the second time installation.
Drill a starting hole
Using a drill bit suitable for use on metal use a 4mm drill bit to drill a pilot hole on the inside of your masked area. Then with a 10mm drill bit open out this hole so that there is enough room to fit your jigsaw blade.
Start cutting
Here goes nothing, start the jigsaw when it is firmly in the drilled hole. Make sure it’s not touching anything and bring the blade up to full speed before making contact with the metal.
Going slow is key, be patient hold the saw with both hands and cut slowly.
Tape the window to the body
As you’re cutting make sure you tape the window cut out to the panel of the van. This ensures the window remains fixed as you cut, which in general just makes cutting easier and stops a piece of sharp metal from vibrating and injuring you.
File & paint the bare metal edge
Congratulations you’ve got a bit gaping hole in the side of your van. You don’t want it to get any bigger so make sure you carefully hoover up any metal shavings. They get everywhere so be thorough on this, they can spread rust like wildfire.
Paint the exposed metal edge with an anti rust metal pain.
Apply the trim
Now that you’ve let the paint dry you should apply the knock on trim so cover the exposed edge and the give the window an internal lining. Carefully make your way round the window knocking on the trim with a hammer.
Clean the window and apply the primer
Window installation kits come with acetone wipes which you’ll need to use on the inside of the window on the black edge to remove any organic material. On the van you’ll need to prime using the primer and applicator, be careful this is smelly stuff and not something you want to get on your skin or clothes so wear the right protection. 6:15 in the video you can see the outcome of this.
Use a mastic gun to apply the bond
The polyurethane that bonds the window needs to be heated up before you apply it. It’s really thick stuff and your hands will thank me, place the tube in the sun or in some warm water for an hour to get it easy to work with.
If you use a kit like the winbond you’ll have a nozzle designed to squeeze the polyurethane evenly onto your primer layer. If you don’t you need to ensure you’re making a cone by slicing a V shape into your nozzle. You then move around the window with the V facing away from the direction of movement to leave a nice bead of polyurethane behind you!
Fix the window in place & tape
Finally fix the window in place using the suction cups and tape to ensure it doesn’t move as it sets!
Well done you’ve done it, open a cold one and get back to work!