In this post I’m going to discuss everything you need to consider in your van conversion solar setup & also review the products we’ve used in our van build.
Quick Links:
- Our thoughts so far
- How much solar do you need in a van conversion?
- What van conversion solar equipment we use
- Solar panel van conversion wiring diagram
- AGM vs Lithium Batteries
- Solar kit recommendations for van conversions
Our thoughts so far
We’re three weeks into our van life adventure and I thought it would be worth reviewing how we’re getting along so far.
I’m currently writing this from our van parked up on the Northwest coast of Norway. We have two solar panels one is a portable panel which is currently angled towards the rising sun and the other fixed panel is on our roof. We have a total of 435W which is charging our 200AH leisure battery.
I’m going to cover our entire electrical setup in another post so look out for it, for now this post is going to focus in on purely the solar setup.
First i’ll go over what our requirements were for power. If you’re still contemplating what to buy for then hopefully our situation will help you refine your requirements.
How much solar do you need in a van conversion?
This depends on how many appliances you’ll be running & where in the world you’ll be going. As the latitude you are on this planet will change the angle of the sun. To get the most out of solar you need your panels to be perpendicular to the sun, essentially if you’re nearer the equator you could get away with less than if you’re up north.
We needed to charge laptops and phones everyday with moderate use out of them. I calculated this to be two full charges of my computer and one full charge of Emily’s computer. I have a MacBook Pro 15 and the power adapter is rated at 85W. It takes 1.5 hours to charge so two full charges in a day will use 85W of energy for 3 hours. To convert this to amp hours you need to calculate how many amps, 85W’s is.
Power = Voltage * Current
Through derivation this means that if you divide your watts by your voltage of your system (12v) you’ll get the current.
But wait there is an added complexity here, your inverter will also be adding over amperage to your system as it wastes energy converting 12v to 240v (120v if you’re in the USA).
In order to convert 12v to 240v you need to have an inverter and these are not completely efficient. I know that my inverter draws 10W so I need to add that to my total.
This equates to 95/12 = 7.9 amps per hour
Then running for 3 hours means I would use 23.7amp hours.
Let me know in the comments if this was more or less than you expected!?
Further to this we had to charge drone batteries every couple days & camera batteries less frequently. Not forgetting we needed to run basic necessities such as having a fridge on 24/7 and being able to pump water on demand.
So how did we make our assumptions.
We assumed on average each day we’d get over an 8 hour period an average yield of 90W from our panels per hour.
90W per hour is 7.5 amps which is a total yield of 60amp hours per day.
“Real time” stat: It’s 11:30am and the panels are pulling 93W and it’s moderately overcast. So far so good on this assumption.
Other electrics
- Dometic Coolmatic 80L CRX fridge – This runs at 4 amps but only runs about 20% of the time, this will change if we’re in a hotter climate or the van is hotter but so far it’s averaging around 0.66amps per hour or 16amp hours per day
- DJI Mavic Air – 50W draw and this runs for 60mins for a full charge. Needs charging once a week
- Sony A7iii – 100W this runs for about an hour – Needs charging once a week
- UEboom – 20W for about 2 hours charge. Needs charing once a week
So our two main consumers are our laptops & fridge totalling the 40amp hours per day. We added 30% to say we’d need 52amp hours per day coming in.
What van conversion solar equipment do we use?
Panels
Our main 335W panel is an LG panel
Our support panel is a 100W panel from Giosolar panel you can find this on amazon
Controllers
Ctek 250SA
Breakers/Fuses
Inline 30A MC4 Fuse you can find this on No products found.
Isolator switch you can find this on No products found.
Cable
Extension cable – 10AWG BougeRV you can find this on amazon
Mounts
Corner plastic mounts from Photonic Universe No products found.
Bonding
Sika flex 512 amazon
Sprinter Van Conversion Solar Wiring Diagram
I’ve created a simple wiring diagram to show you exactly how all of the gear is fit together.
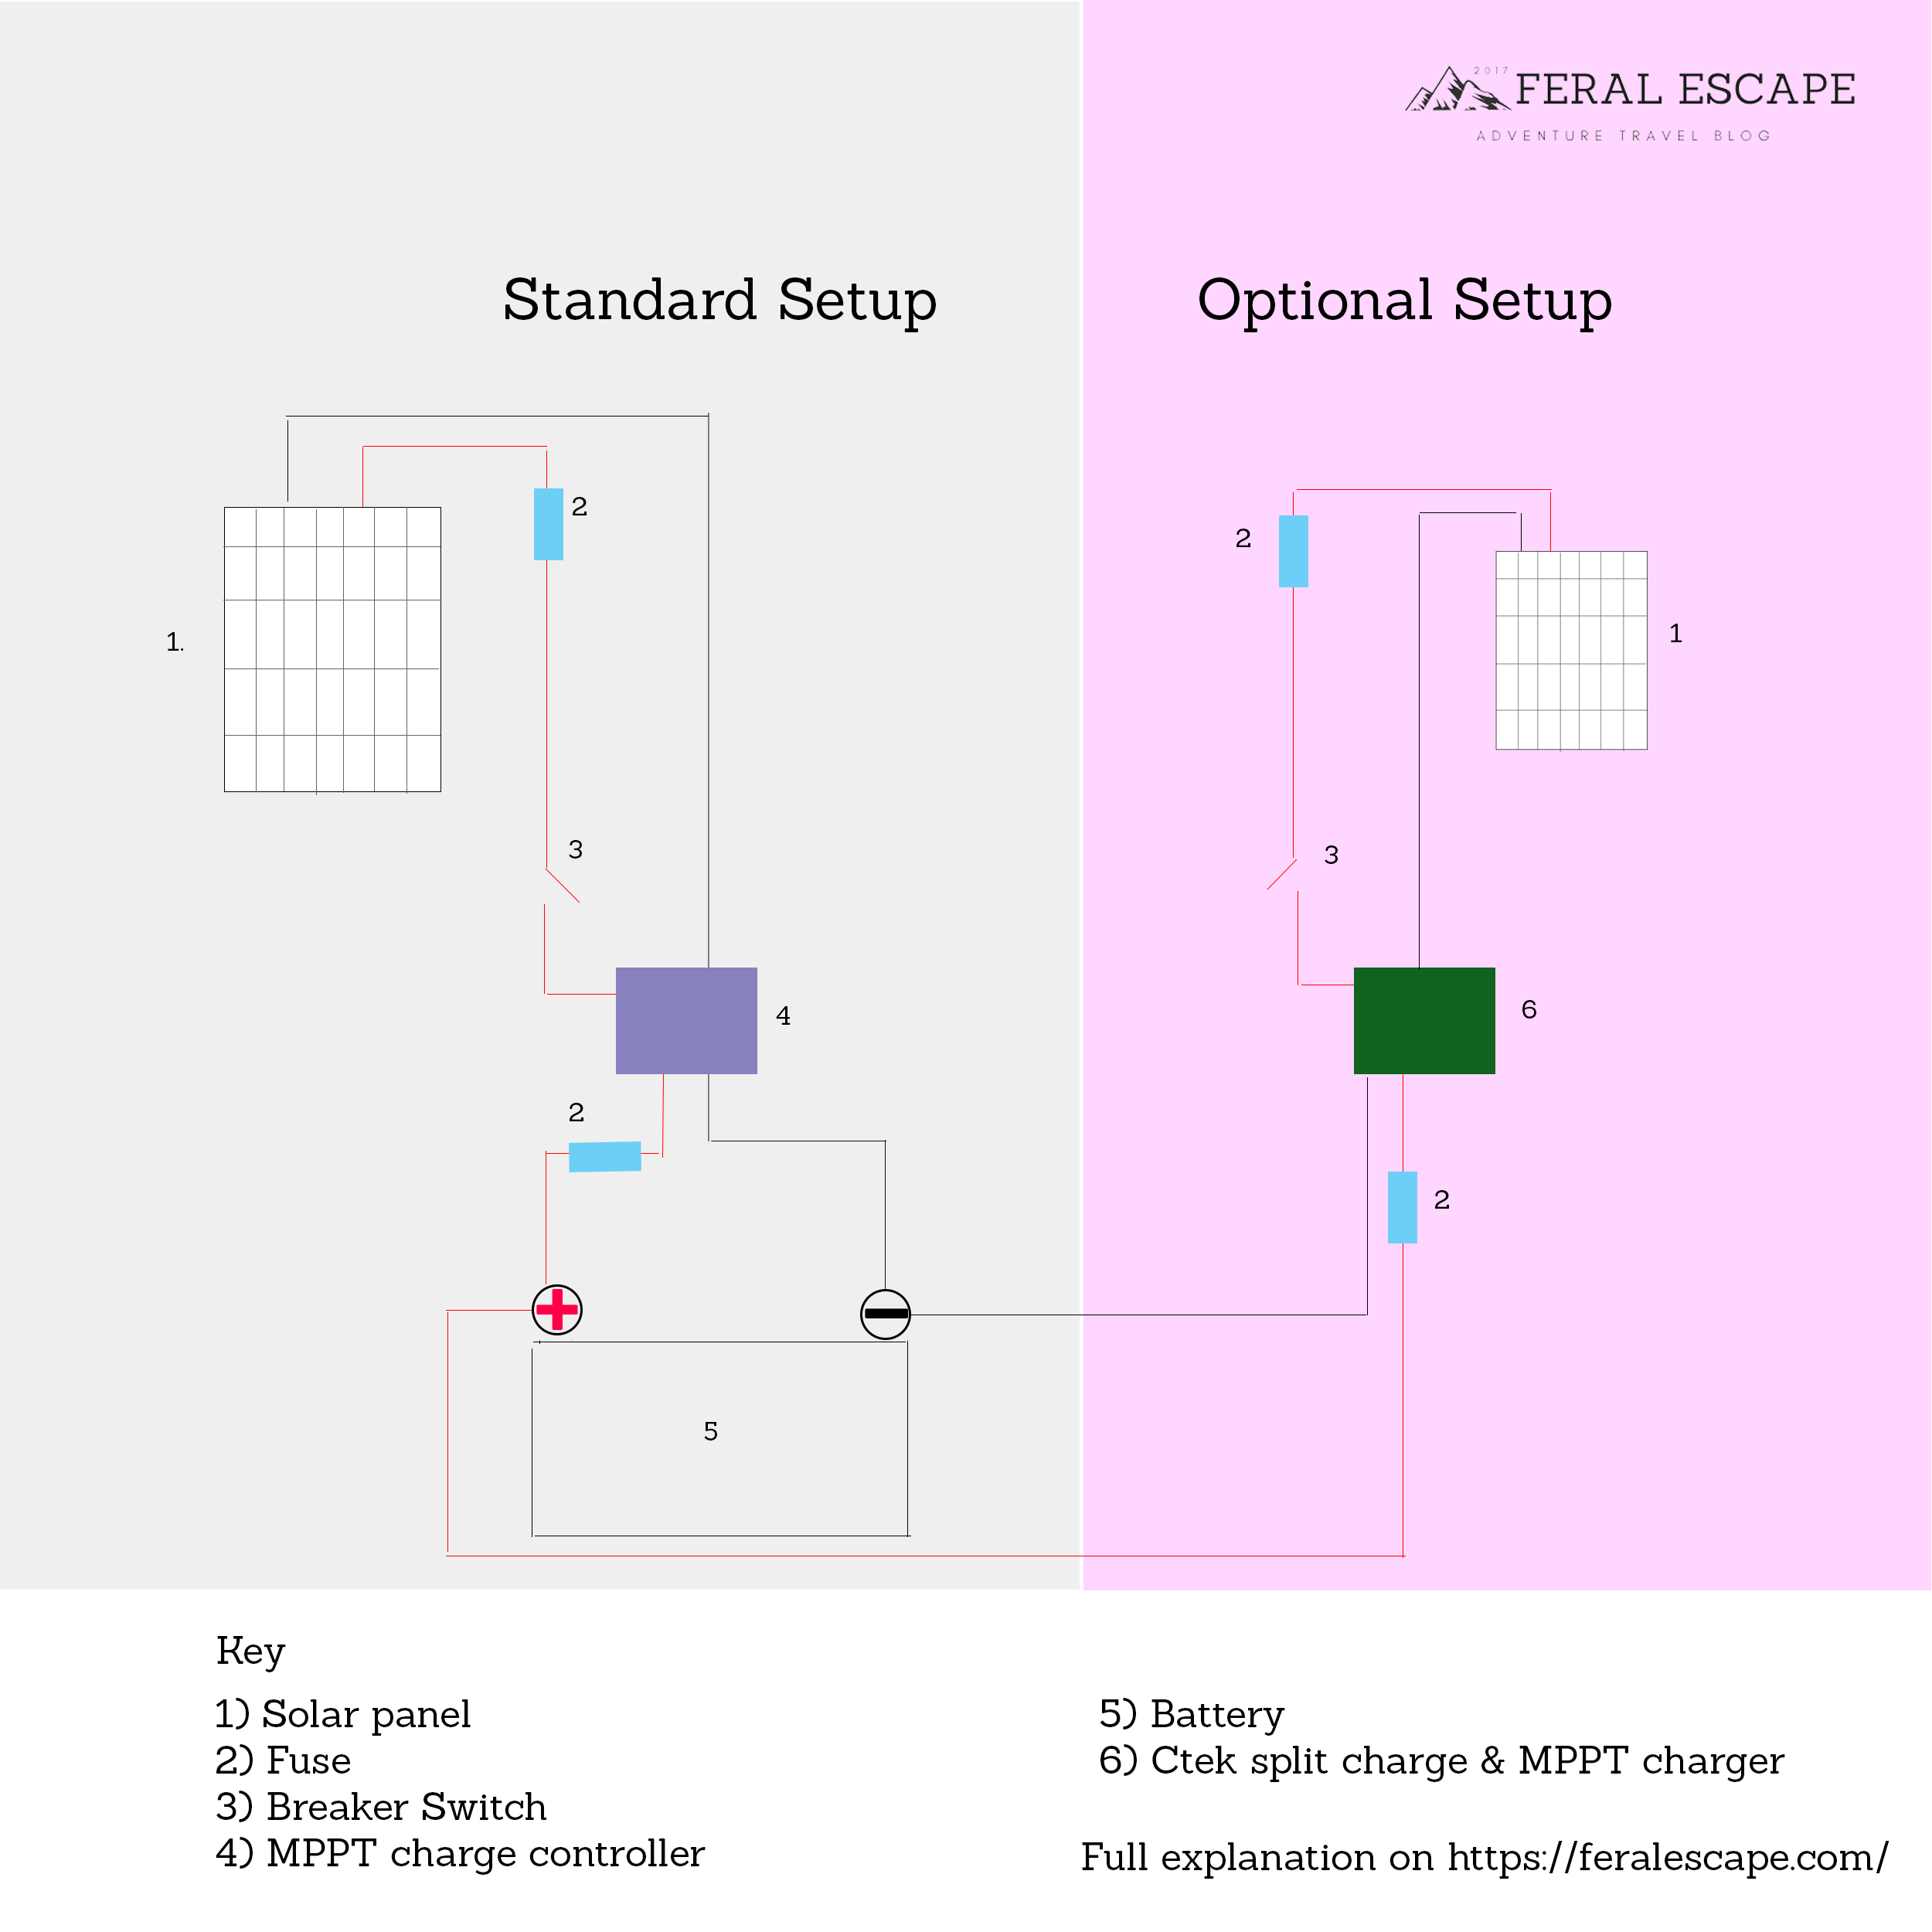 So let’s breakdown what’s happening in this diagram.
Standard System – use this if you’re doing a standard setup with fixed panels on your roof
The panel goes through first a fuse, this should be rated at 25% more than the max amperage of the panel. Make sure that this is easily accessible behind a panel that is removable otherwise you could make troubleshooting a nightmare. The panel comes into a breaker switch, this is so you can easily isolate the solar input from your electronic setup.
From this breaker the cable get’s fed into the charge controller then connects again through another fuse into your battery.
This is the core system you’re going to need. Things need some slight modifications if you have multiple panels.
Tips:
- Try to make the length of wire from the solar panel to the charge controller as short as possible. This limits the voltage and increases efficiency
- Don’t tightly bind/bend solar cable try to keep things as straight as possible
To recap you don’t need two charge controllers in a conventional setup we only have two because the CTEK system doubles up as our split charger from the alternator. A typical split charge relay will not work with our van as we have a smart alternator. The setup procedure is identical to having 1 controller.
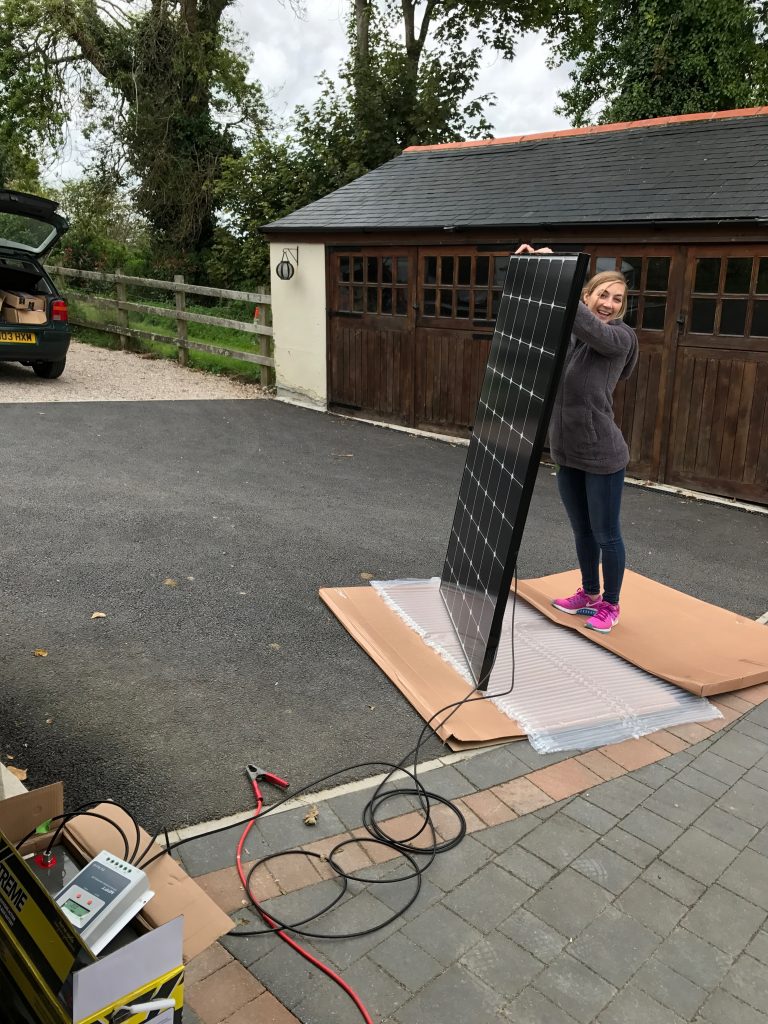
So far this gear has performed really really well. The flexible panel has proven to be bullet proof.
I’ve driven off with it dragging behind the van and there was barely a scratch on it, thankfully it was dragged face up.
The charge controllers have performed really well and in combination with our battery monitor (Victron energy BMV 700) we can easily see how the overall system performs.
AGM vs Lithium Batteries
Lithium batteries are so hot right now, it seems like everyone is getting them.
Let’s have a look at the pro’s and con’s first to explain why in our system we’ve opted to go for a AGM.
Pro’s of lithium batteries
- Lighter by up to 60% per amp hour compared to AGM
- Higher discharge usage – you can discharge up to 80% compared to 50% on AGM batteries. This means you get a lot more usable energy per amp hour of your battery
- Higher number of cycles – as you’ve probably experienced with you phone as a battery ages it becomes less efficient. Lithium batteries can do far more cycles and therefore have a longer lifespan than AGM batteries
Con’s of lithium batteries
- Cost a 200ah lithium battery will cost 5-7 times as much as the equivalent AGM counterpart. (Comparing our AGM vs Victron 200ah lithium battery)
- It’s new tech, as lithium is only just hitting consumer shelves products haven’t been tested for their lifetime use and not all kinks may have been ironed out.
- Less technology available that integrates well with lithium ion e.g. split chargers.
The thing that appeals to me is the high density energy. We have a limit of 960kg of payload in our van. We weighed the van before we moved our personal items in and it weighed 3100kg. Of the 500kg of weight we put in the van from the solar, awning, swivels etc the battery accounted for 14% of the total weight. I’d love more room for gear so keeping batteries light appeals to me.
Pro’s of AGM batteries
- Cheaper
- Have been used for heavy shock/changing environments and are tried and tested in extremes.
Con’s of AGM batteries
- Heavy
- Can’t discharge past 50% unless you want to kill the number of cycles you’ll get out of the battery
So why did we choose AGM?
Honestly it was the upfront cost. Our battery cost £300/$400 to get the equivalent lithium ion was £2000/$2617. We didn’t know how long we’d be in the van, were worried about resale value and if we’d lose a lot of that investment so we went with the safer option. Also we knew we’d be in a huge range of environments to the Alps in the winter to the hot summers of Portugal/Spain and we felt that the AGM would be a safer choice.
Sprinter Van Conversion Solar “Kits”
I’ve put together some kit lists for different solar power requirements. Weekender/Explorer/Intrepid. These are an idea of a system design based light, medium and high usage and with the brands/technology I would use if doing our setup again.
| Item | Weekender | Explorer | Intrepid |
|---|---|---|---|
| Panel | 200W | 2 x 200W | 3 x 200W |
| Fuse | 20a | 30a | 60a |
| Charge Controller | 20a | 30a | 60a |
| Isolator | Yes | Yes | Yes |
| Battery | 100ah | 200ah | 400ah |
| Connectors | 2 X dual mc4 | 3 x dual mc4 |
Some more van conversion solar FAQ’s
How to wire solar panels in parallel
In my kit recommendations you’ll notice that I have recommendations for using multiple panels. To wire these you’ll need to do so in parallel. This is very easily achieved with two way MC4 connectors. You’ll need to connect the +’ves together and the negatives. If you have three panels you’ll need a three way connector & follow the same principle.
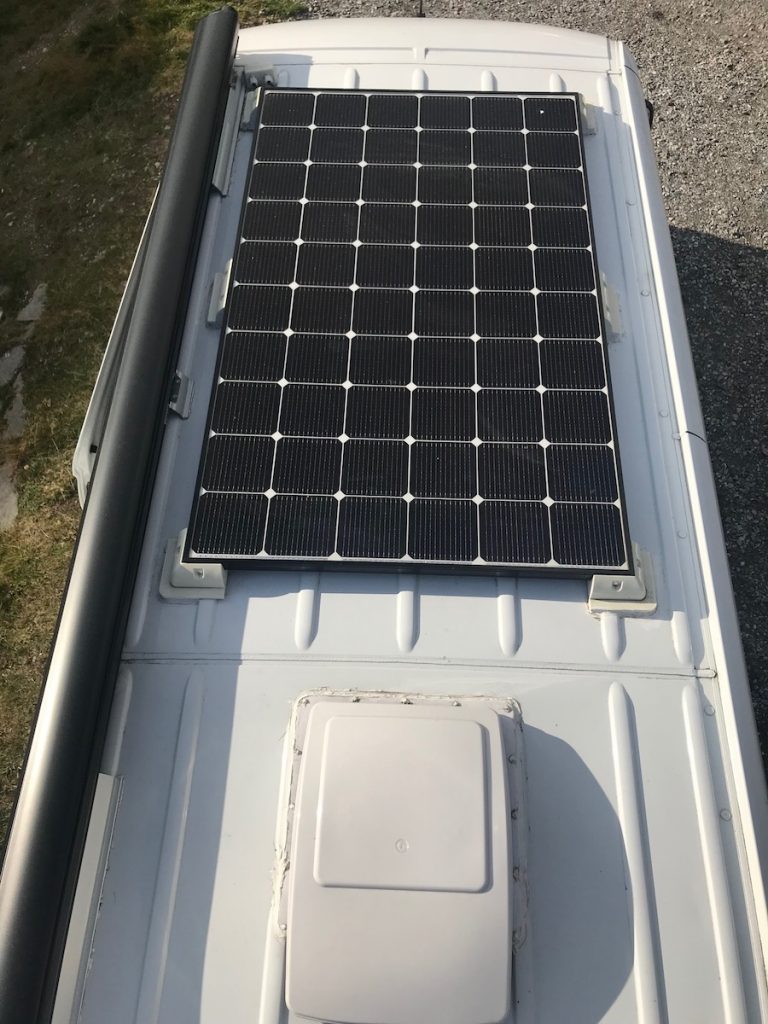
How to attach solar panels to your van roof
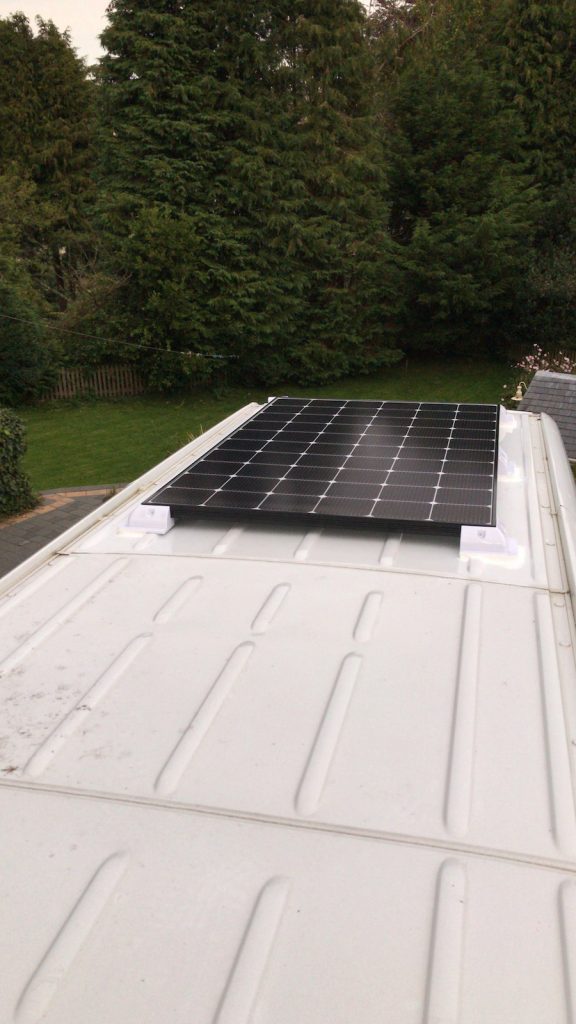 In our opinion the best way to attach solar panels to your roof is mounting them to a roof rack or roof rail system. Roof racks from the likes of aluminess are going to give you lots of functional space on your roof as well as provide an excellent mounting platform.
We didn’t have this luxury on our build and have bonded directly onto the surface of the roof with corner mounts from photonic universe we’ve used sikiflex 512 to bond this to the surface which was cleaned with acetone. So far we’ve travelled 3000 miles with these stuck to the roof and all good so far the bond seems to be holding very well.
Want to get even more our of your panels?
Being able to tilt the panels would be great to increase the yield of the panels throughout the day. For instance being able to tilt in the morning and evenings could yield an extra 30% more power over the course of the day.