How to get there
This hike is situated 5 km outside of Odda, and to get to the trailhead you have two options. First you can drive up a small road to a car park which has plenty of space for cars and motorhomes, parking costs 150kr. Alternatively you can add an additional 10k to the hike by parking near Odda Camping and walking up the road. The road isn’t very steep and follows the river, so the views and scenery is still lovely, if we do this hike again we’d opt for this option.
Having said that we decided to do this hike before doing Trolltunga so we drove to the top. Having just moved out of London we didn’t feel our city legs could handle 50km of hiking and 1500m of ascent in less than 36 hours….
What to bring
As with all hiking in Norway it’s important to bring a few layers, the hike itself is a short and intense climb. You’ll get hot and want to strip down, at the top if you’re hanging around for photos etc it’s quite cold. On one side of you is a cascading run off and the other a giant glacier. This whips up a wind which we didn’t experience at all on the way up.
Essentials are
- Sunglasses
- Hat
- Walking Boots
- Shell Jacket
- Down jacket
- Suncream
- Trailmix
- Water bottle – you can refill in the run off from the glacier along the way, yummiest water ever!
How long does it take
In all the hike will take 2-3 hours round trip with a few stops for photos and snacks etc.
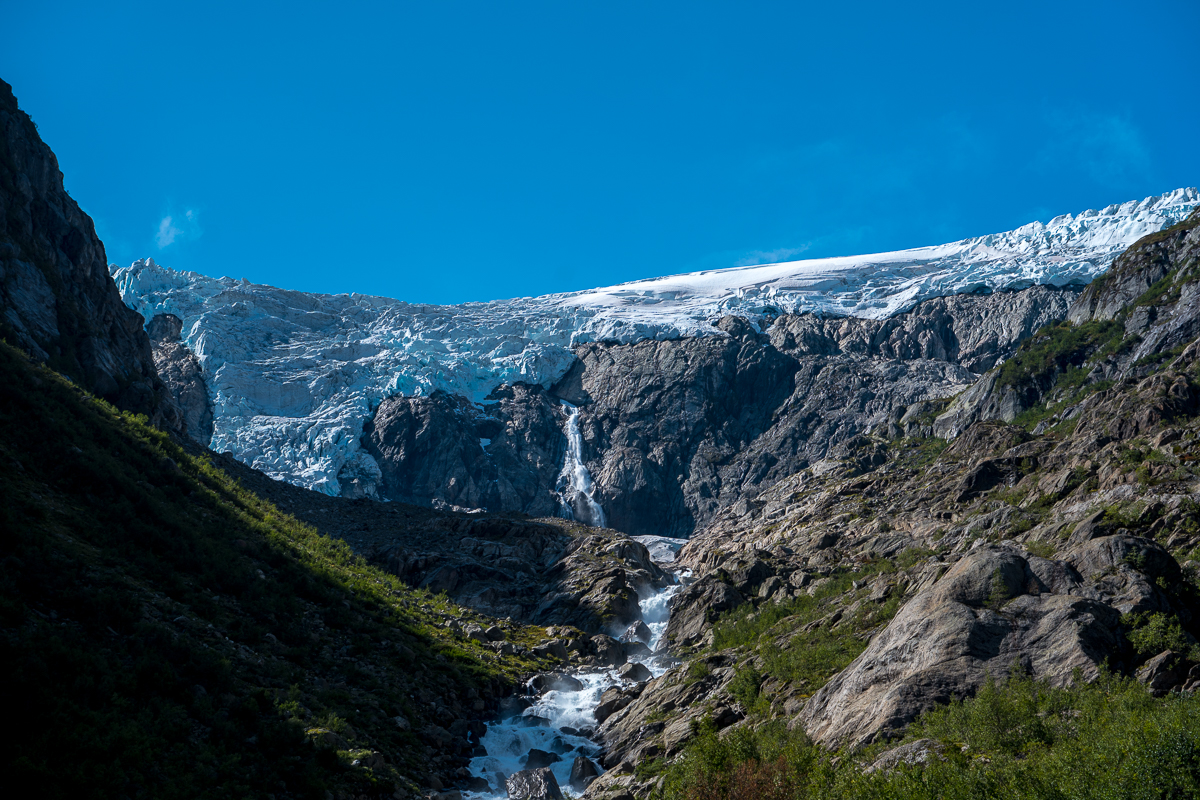
Sights you’ll see along the way
For most of the hike you’ll see the imposing glacier up ahead and the run off cascading down the valley. Boulders, boulders and more boulders are the most common of sights, the glacier once descended far down to the valley below and on it’s recession dropped huge rocks which you’ll be climbing around.
Our Hike Vlog
To give you a flavour of what to expect we did a short hike vlog which you can find on our youtube.
Hike Breakdown
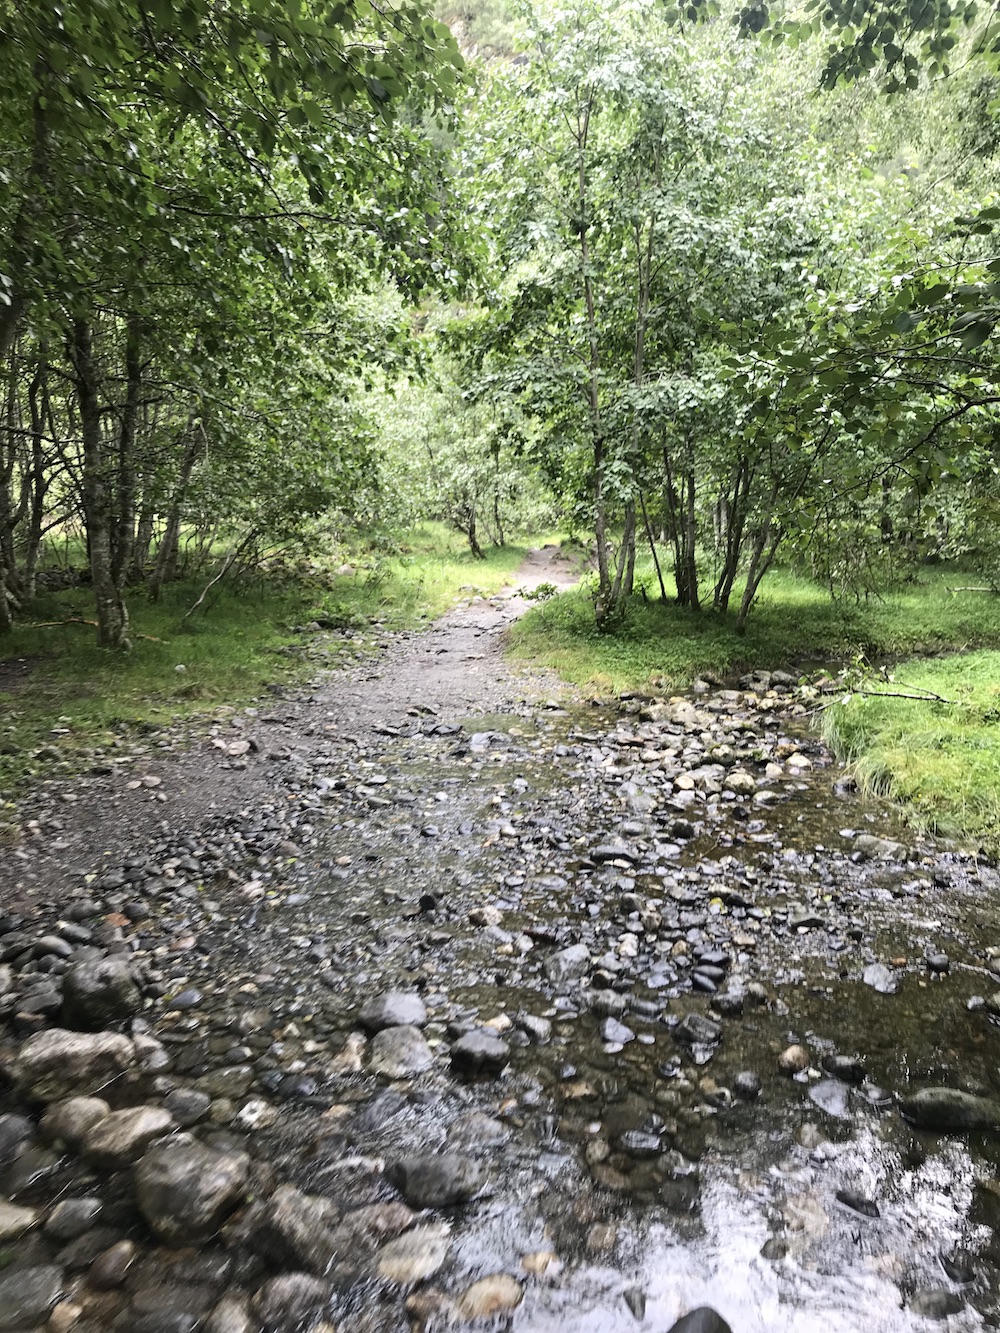
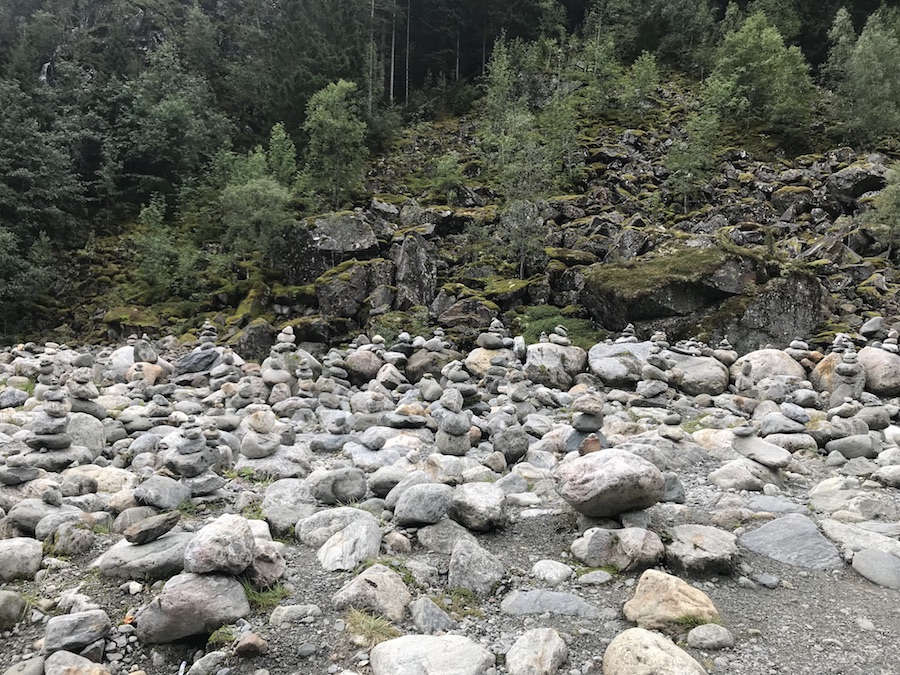
Wooded section
The start of the trailhead takes you into some woods, you’ll meander around the path before coming to a clearing which has thousands of small stone piles/cairns. I have to admit these do look very pretty but I by no means advocate building these as they are no very good for the environment. The true purpose of these stones is to mark a trail and when people build these on trails in poor conditions could leave future hikes down the wrong way.
Next you’ll follow the river before making it back into the woods but this time you’ll start to climb.
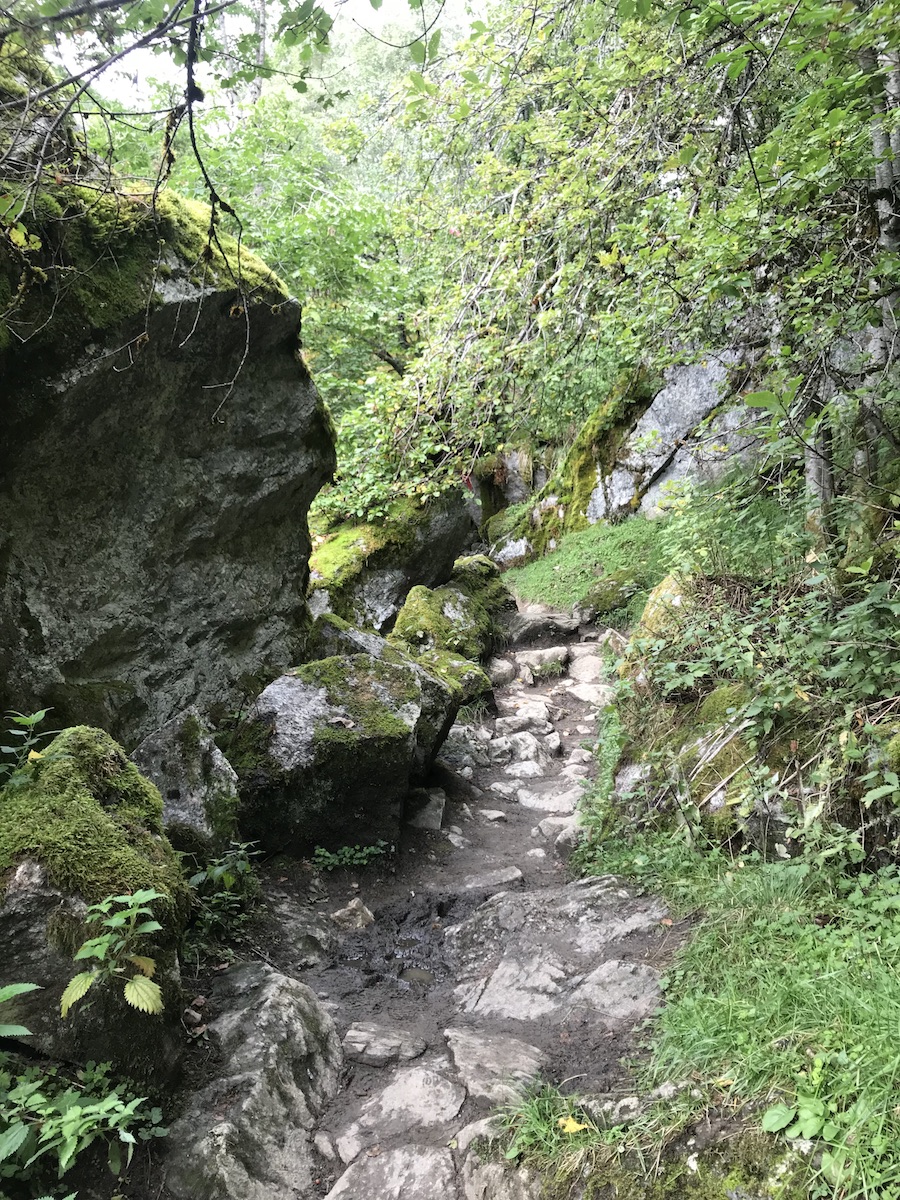
You’ll cross a couple of small streams making their way to join the cascade which stays on your left hand side throughout this hike. Overall this section is simple and lovely.
First Ascent
Once you come out of the woods you’ll make your up following a narrow paths comes to a rock face which will have a rope hanging down from it. (33s in the video), it’s time to pucker up some courage and grab that rope firmly in two hands and pull yourself up.
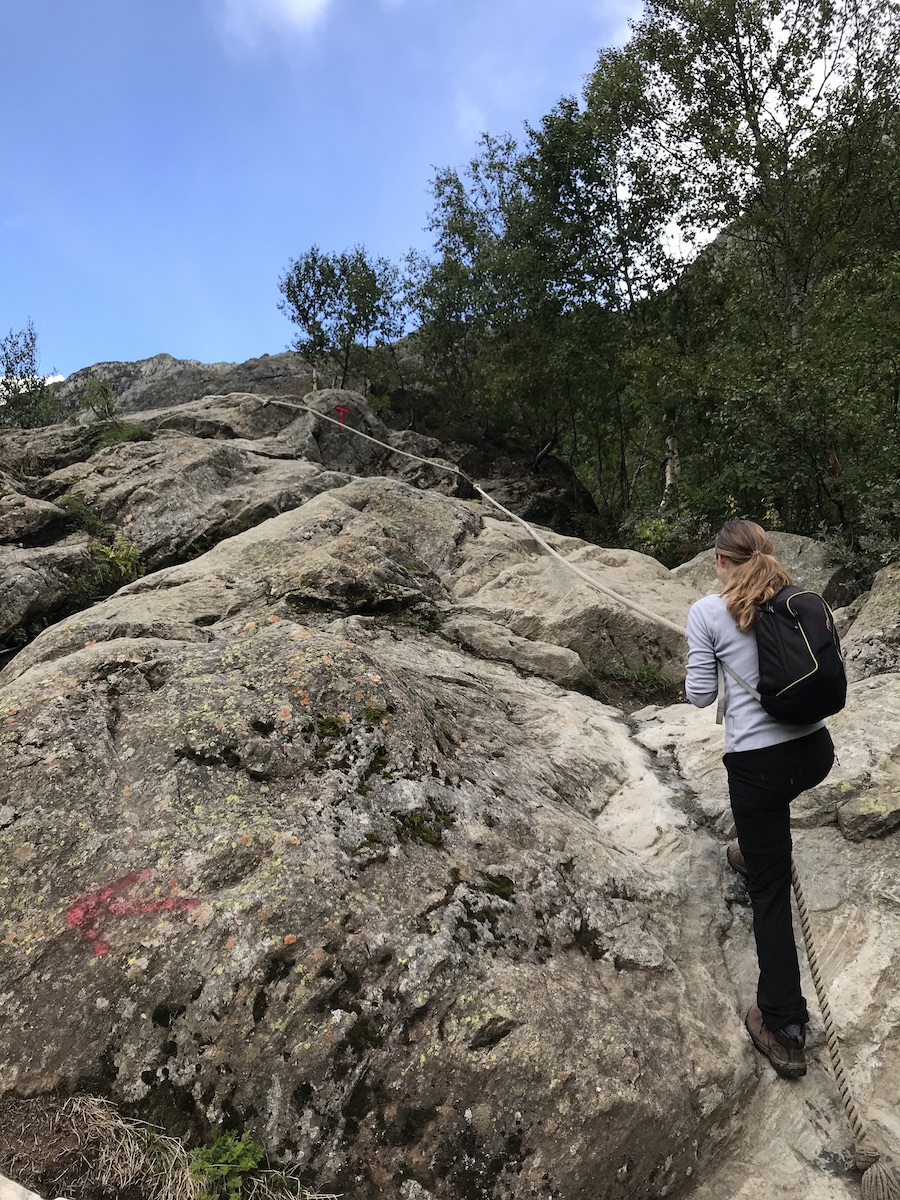
It’s definitely harder than it looks and a complete mind game on your first attempt.
Bouldering Section
 Once you’ve climbed you’ll come to a series of small bridges, the longest being a micro suspension bridge which is supported with strong steel cables but has very thin looking wooden planks. I weigh just over 90kg and it held my weight just fine, it did sway side to side a lot as I crossed which freaked me out a little but was exciting once the initial fear passed. After the bridges you’ll make your way to some more bouldering sections where you’ll be pulling yourself up and over an array of different boulders. Some with flat faces which when wet may be a challenge, some with and some without guide ropes. Overall pulling yourself up over the boulders was one of our most enjoyable parts of this hike.
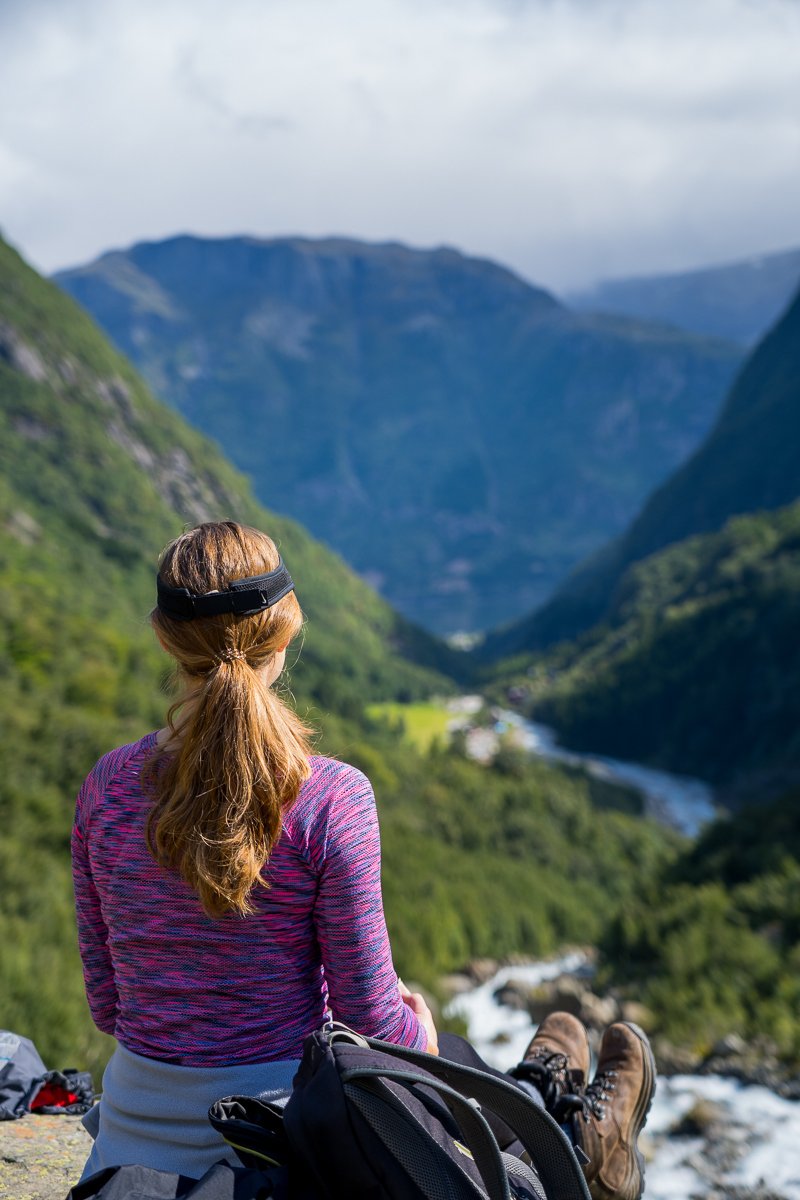
We found a couple boulders which are a perfect stop of point for a snack or some lunch with great views down the valley.
Final Ascent & Top
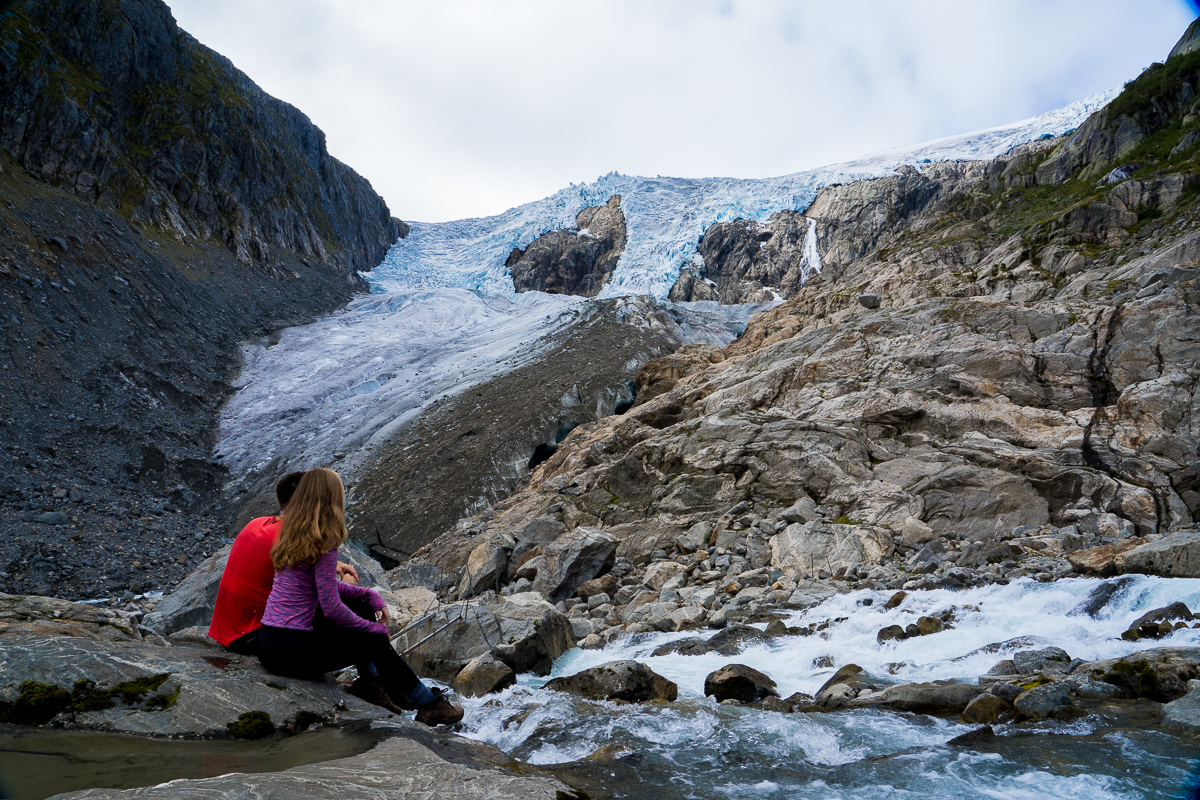
There is a distinctive final climb where you can feel the cool breeze coming from the glacier, at this point the path opens out as people have clearly scrambled and raced up which has created all these new routes. The top consists of a flat rock face which faces the glacier. Your access to the glacier is stopped by a cascade which passes in front of you. Well done you’ve smashed the hike, refill your water bottle and take some pics before returning to the trailhead.
Hike stats
| Length | 3km |
| Difficulty | Hard |
| Type of hike | Out and back |
| Seasons | June - October |
Pin this post!